Laundry Room Makeover

After $2500 bank poorer (or house richer), our laundry room makeover is considered complete. I would consider this one of the easiest projects we’ve done so far in this house. After all, how difficult could it be just to design, pay and get other people to put it together for you?

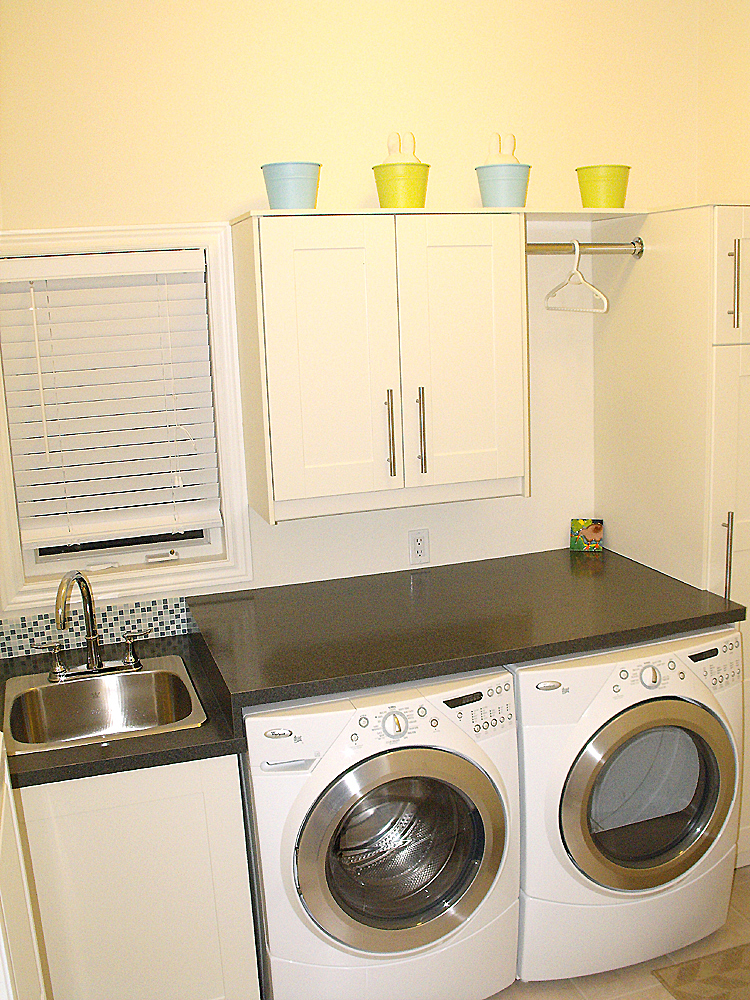
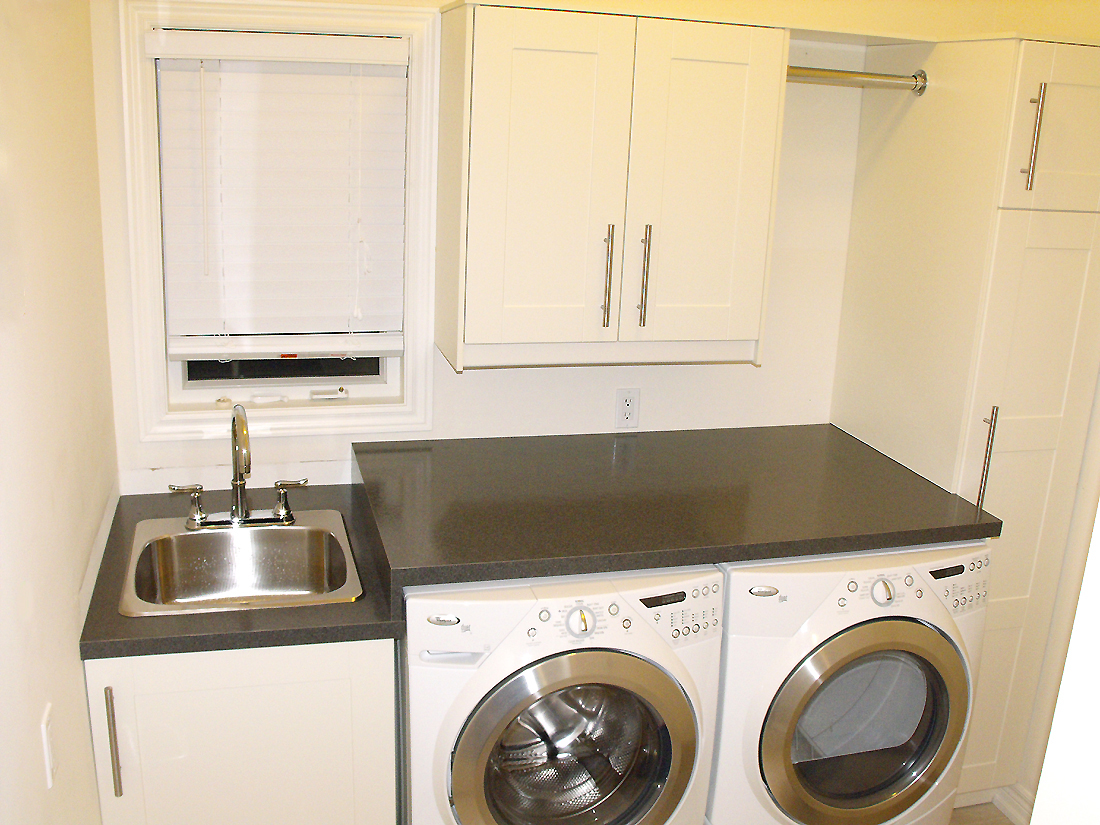
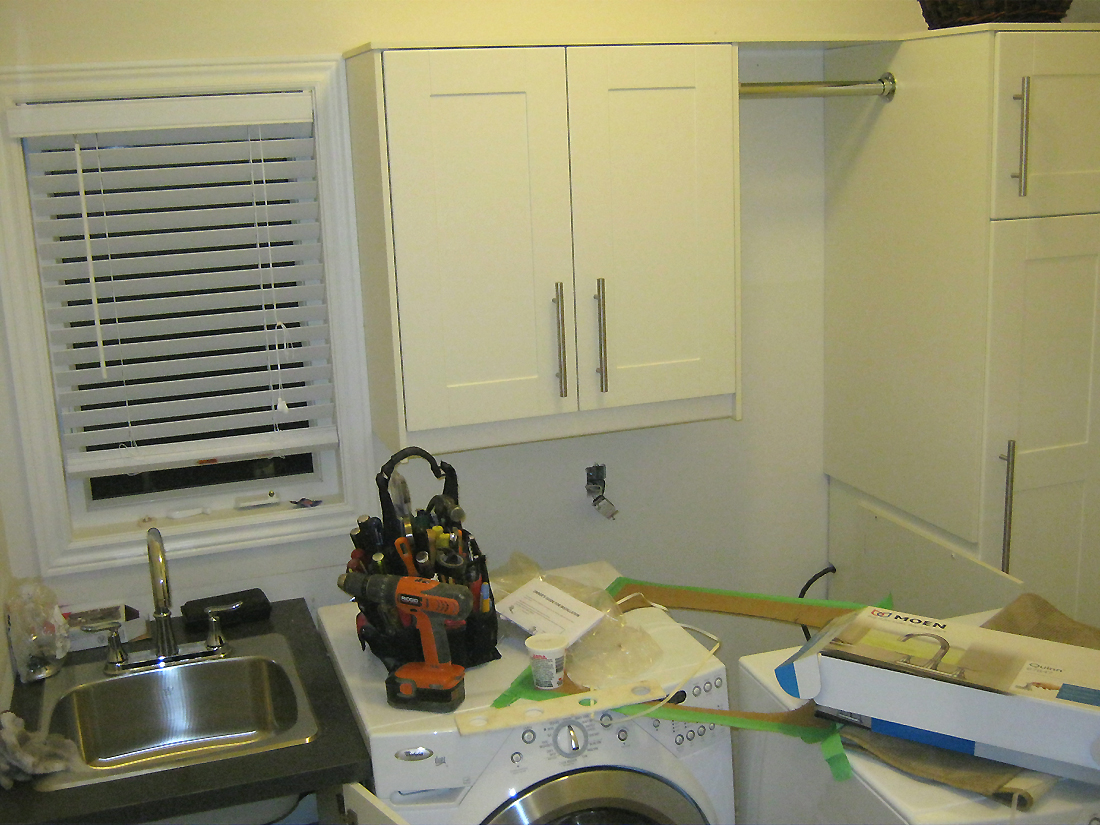
So this is what our laundry room looks like. I love to be able to drop my purse on the countertop, put away my shoes in the pantry, and wash my hands in the sink before I head into the house. The colorful  “Kiwi” enamel tile in the far right corner is a gift from my mother-in-law from her trip back to New Zealand.
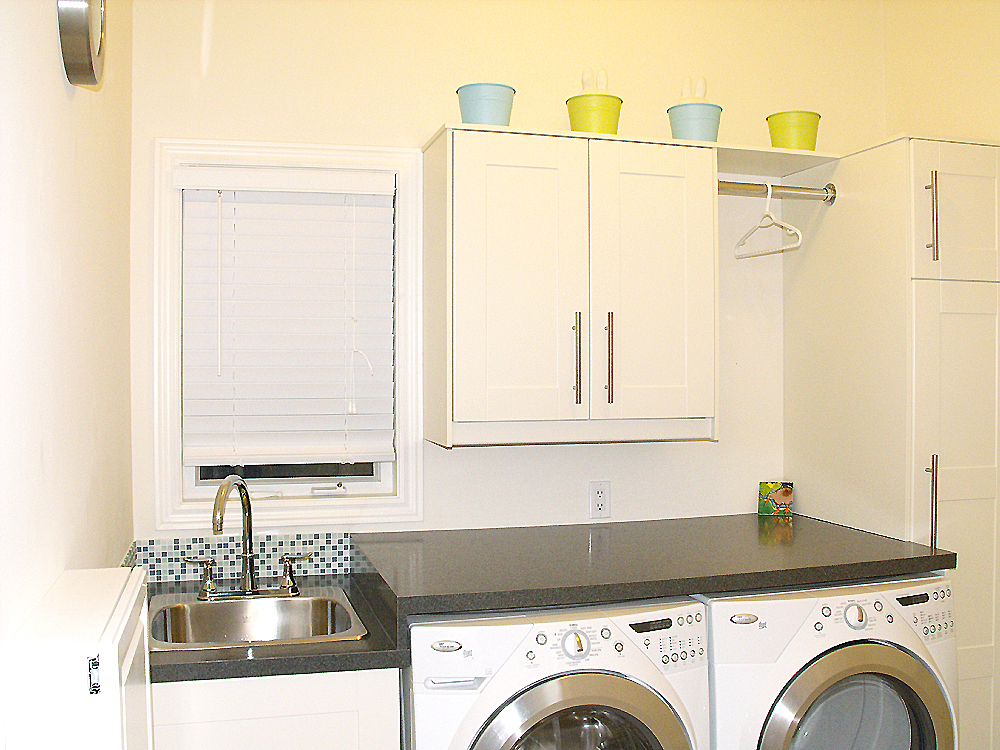
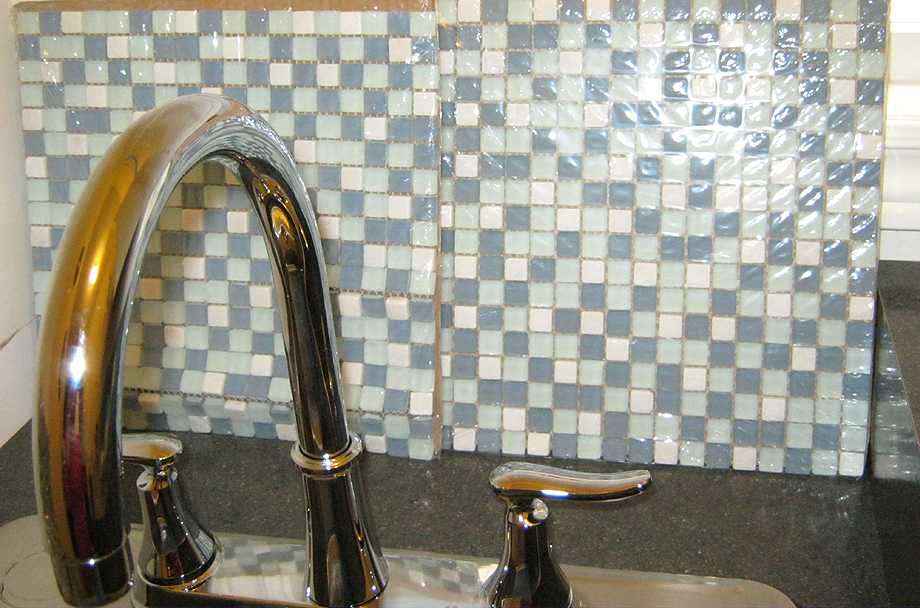
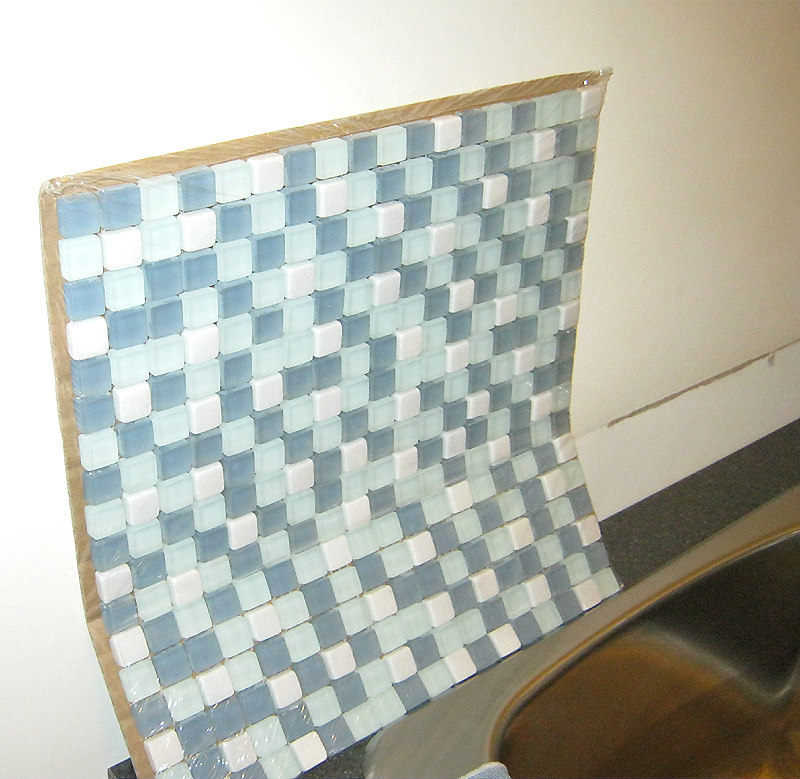
After all I did put up these mosaic tiles myself. I reused all the tools from our kitchen backsplash, and only spent half an hour putting everything in place. The Dal Tile MI96 Blue1 mosaic tiles from Home Depot look so perky and airy — the sort of ambiance I was after for a laundry/mud room.
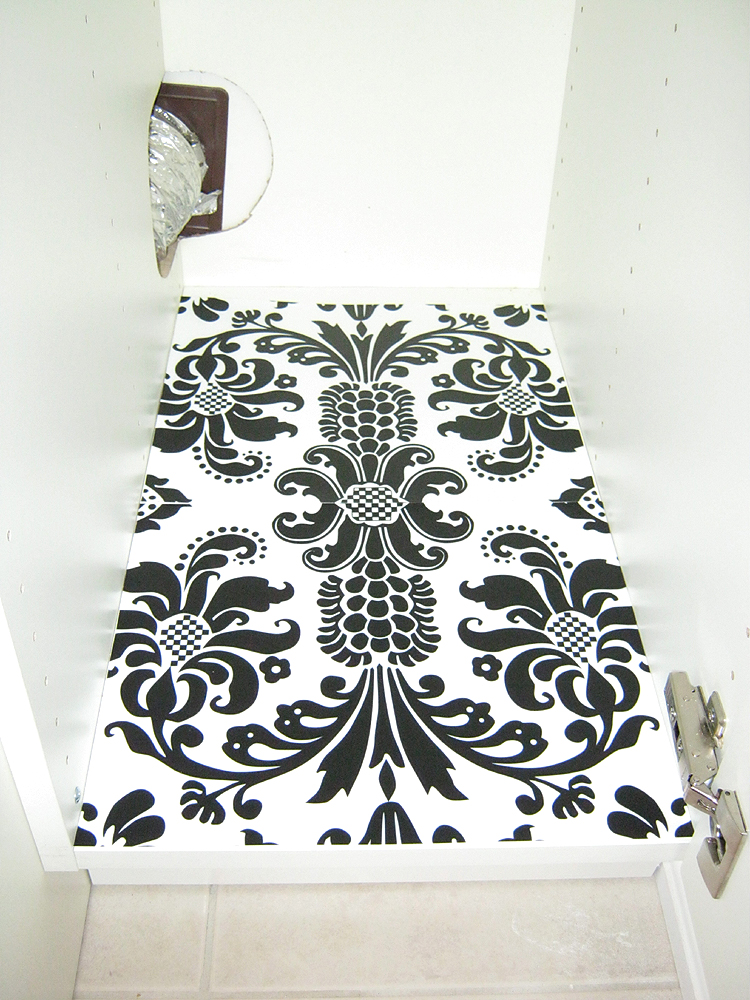
And remember that $25 wall-mounted ironing board cabinet I picked up from Home Outfitters? Here it is: slide the cabinet door to the left, flip up the ironing board and you are in business. Now you see it…
And now you don’t…

I am still debating whether to paint or wallpaper the wall or leave it as is. The weather is too dingy these days that I can’t wrap my head around what color would work for a sunny room like this. We are heading to Italy for a few weeks, so I will have plenty of time to think about it.

Our next project? Shall we Take It Outside?!

Done with Laundry Room Makeover….Almost

As a follow up to the last night’s post, this is how my laundry/mud room looks after the makeover. The frame is done, so now I can be off to my favorite part — decorate it.

The Formica Smoke Quarstone countertop in Radiance/Glossy finish looks fabulous. A laminate countertop is practical and economical for a laundry/mud room.

 I opted for a smaller (21″x21″x8″) kitchen sink to make room for more storage. After all hands will be all we wash here.
So I started to pick out tiles for the backsplash. Thankfully this time we only have a tiny area to tile, and with the kitchen experience under our belt, this one should be smooth sailing. So far I’ve settled on this greyish blue + white stone and glass mosaic called Dal Tile MI96 Blue from Home Depot. It’s really inexpensive, and it seems to work with the room’s color scheme.
 Dal Tile MI96 Blue from Home Depot
 And this is a cheap-n-chic DIY drawer liners I made today. The plastic placemats are two for $1 at Dollarama. After cutting them to fit the pantry shelves, I used double-sided tape to secure them in place. And that’s it, $1 for a water-proof, washable and stylish drawer liners where Anthony could park his shoes on.
 And here’s something silly we did today. While at Ikea looking for Salong vases (btw, though beautiful they are too small for my laundry room), Anthony suggested these Socker Plant Pots to add some colors to the room. They are very light-hearted and cheerful. I will leave them there for a few days and decide if I want to keep them.
 This is what I was initially thinking to put on top of the shelf — wooden letters – such a design cliché, isn’t it?
More pictures to follow after the complete makeover.

Laundry Room Work in Progress

We kicked off our laundry room makeover yesterday, and we immediately learnt that no matter how well we planned ahead of time, no matter how great it looked in any type of design software, we need to embrace ourselves for surprises. And just like that “Love It or List It” show, we don’t always get all we are promised.
So here is the final design of our laundry/mud room. The bridging shelf I was very much excited about didn’t happen as there’s not enough clearance for the rod. The double-door sink cabinet showed up as a single-door one. The power outlet for the washer is well above the countertop so it needs to be relocated.
Here is a WIP picture of our laundry room as of tonight. The electrian/plumber is still try to hook up the faucet/sink and relocate the power outlet. The countertop can not be secured until his job is done. The Ikea Adel cabinets turn out great.
So back to the laundry room I go. Will post some more pictures later.

Wall Mounted Ironing Board Cabinet

Our new laundry room design has pretty much left no room to tuck away our old ironing board. Let’s see a show of hands…how many of us hate to drag out, set up and then fold away an ironing board? Well, at least I do!

I’ve started to look at ways to utilize the vertical space instead. At the rate household innovations are going today, chances are, whatever you can think of already exists. A wall mounted stowaway ironing board cabinet is the answer to my problem.

So I started my search on Internet only to find a very limited number of designs ranging from $180 to $600! The cheapest one with a nice white wood cabinet door I could find in Canada will cost $329 from a major kitchen and bath store. So I’ve decided to call a few “prime suspects” that may carry novelty things like this. When I got to the Home Outfitters their store manager told me they have a wall mounted ironing board on clearance at $40! What??? I asked her to walk me through the description (sliding cabinet door, white wood cabinet, stowaway ironing board, iron shelf, etc.) and it sounded like exactly the same one I was looking for! Unfortunately they were all sold out so I had to call a few stores until I got to the one in Markham, and they have only one left!

I didn’t think a deal could be that sweet until I rushed to the store and saw the one that’s exactly the same as I was looking for at MSRP $329! The store manager wanted to get rid of the last one so she offered me this ironing cabinet in perfect condition at $25!!! So I got a $329 Wall Mounted Ironing Board Cabinet for $25, or 92% OFF! Unbelievable!

This is the Wall Mounted Ironing Board with a slide white wood cabinet door.
When the panel is slide-closed, the cabinet would look integrated with the rest of the Ikea Adel White cabinets we are putting up in the laundry room.
(not my house)
Happy Valentine’s Day, everyone!


Laundry Mud Room Makeover: Taking the Plunge

The urge to renovate our laundry mud room is stronger than I anticipated. I thought I could stall it for a while until it gets warmer, but no, after I always dropped the Red Velvet Cake we got for VD struggling through the doorway, I decided NOW is the time.

This is our laundry mud room layout now. The door from the garage opens into this mess.
 This is my first take on a new layout to add more storage and function to the room.
After consulting a contractor specializing in custom cabinetry, I’ve re-arranged the layout a bit to maximize the storage space. 
I also made a major decision to go with Ikea’s White ADEL cabinets! I’ve seen how wonderful a big-box store cabinets could turn out given the right design from many interior design shows on HGTV, and now I finally get to venture it!
Here’s a portfolio of our new laundry room elements.
From top-left corner clock-wise:
  • 3-hole SS kitchen sink from Rona (a SS kitchen sink is way cheaper than a laundry sink if you don’t need a very deep one);
  • Moen Quinn Chrome High-Arc Faucet;
  • Ikea Salong and Persika Vases;
  • Ikea ADEL White Shaker-style Cabinets;
  • Martha Stewart Living Fabric Drawers from Home Depot;
  • Formica Smoke Quarstone Countertop in Radiance Finish;
  • Fractured Earth Series Glass Mosaic Tiles Backsplash from Tile Showroom;
  • Tension Rod.
This is what a typical Ikea ADEL White kitchen looks like.
To take everything apart and install all the cabinets and plumbing will take a whole day. To purchase all the components including to have the countertop custom made will take about two weeks. Therefore, I should be able to reveal what our new laundry room looks like (and how well it functions) in just over two weeks.
Stay tuned…

My Next Project – Laundry Room Makeover

Our laundry room is double-duty as a mud room because our garage leads to it, and we need to go through it to enter the house. It has been a constant struggle for us during the winter when our shoes trap nothing but muddy water into the room. To make things worse, our tiny closet inside the laundry room is so full that Anthony has to park his ginormous shoes on the door mat all the time! And they get stuck underneath the doors every time we open and close them, and make an even bigger mess on the floor!
There I finally had it with our laundry room. This is the plan I drew up in the PPT for our future laundry/mud room. More storage, multi-task, and more functional are my key objectives. The garage door into the house is on the adjacent wall to this one, and I am adding a “Shoe Cabinet” right by the door so that we could put shoes in there as soon as we enter the room.
Here is a list of things I will need for this makeover project:
  • Custom cabinetry and hardware
  • Countertop
  • Stainless steel sink & faucet
  • Tension rod
  • Backsplash??? (is it too much to add backsplash in a laundry room?)
This is going to be a contractor plus DIY project, so I am yet to find out how much in total it will cost. I will post some updates later. Stay tuned…